The Google Tag Manager app runs your Tag Manager container on every page of your storefront, checkout and the order confirmation included. It also pushes shop events to its data layer in Google Analytics 4 ecommerce format. From there you run your own tags: Google Analytics, Google Ads, Meta, TikTok or any other tag you manage in Tag Manager. The app follows the shopper's cookie choice through Google's Consent Mode v2.
The app works on every plan and in every country.
Before you start
- A Google Tag Manager account with a web container. You create one at tagmanager.google.com.
- The container ID. It looks like
GTM-XXXXXXXand stands at the top of your container's workspace in Tag Manager.
Set up Google Tag Manager
Open the App Store and open Google Tag Manager. New stores have the app installed already. If you see Install, select it first. See App Store.
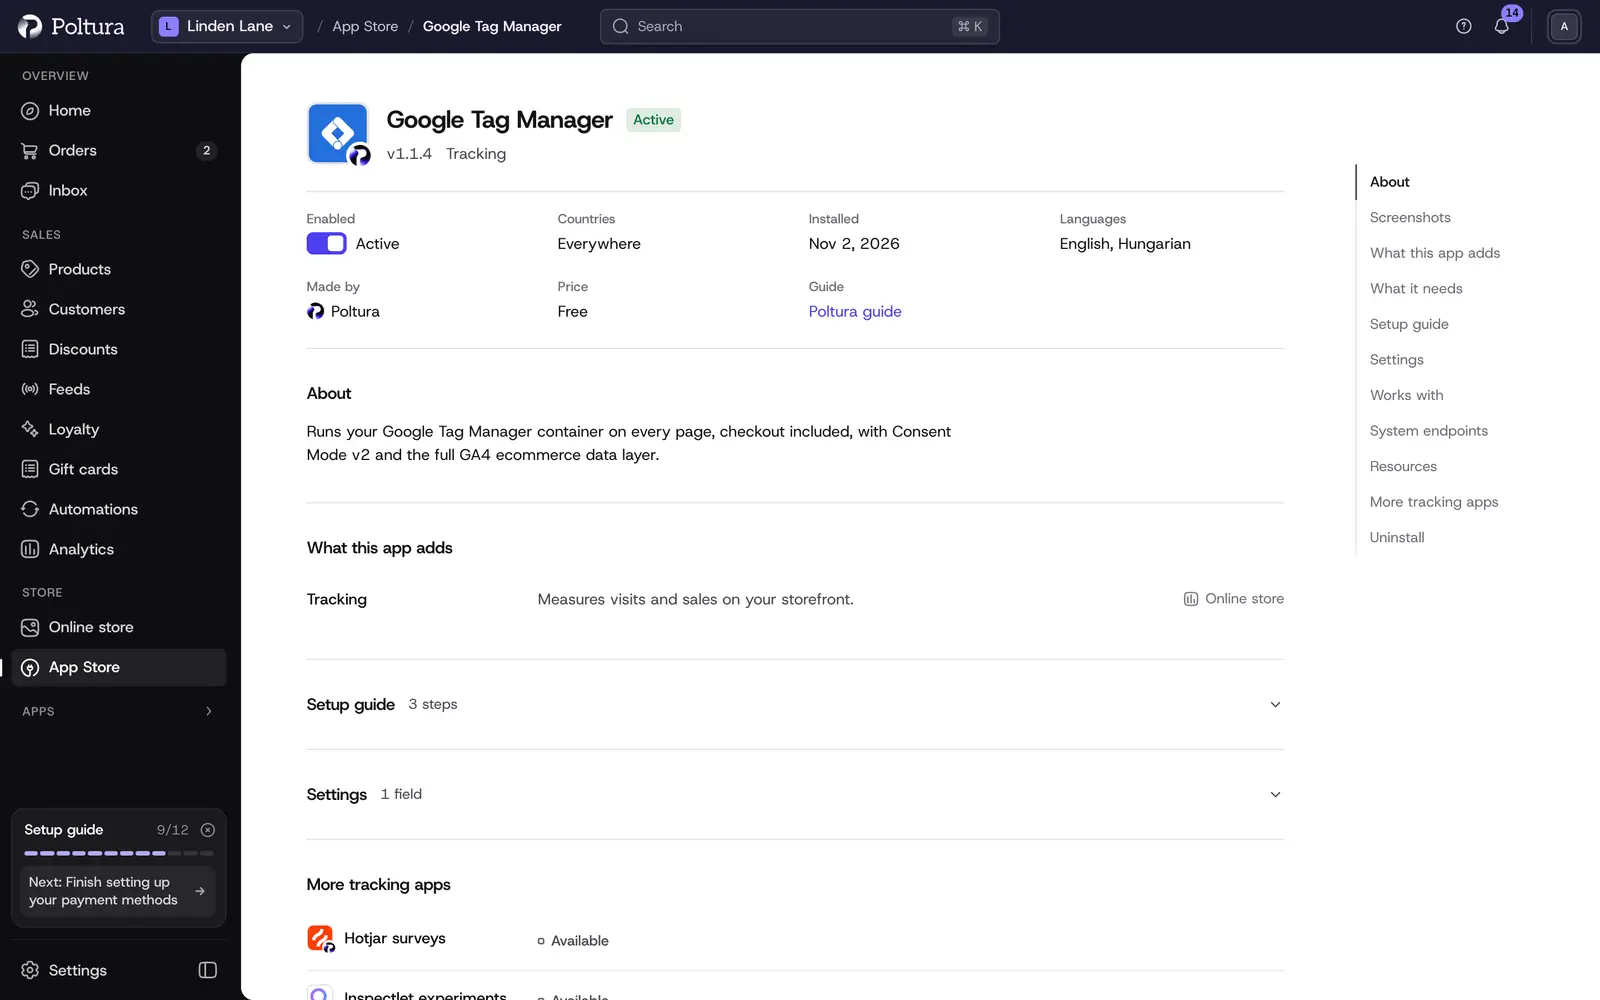
Open Settings on the page to reach the Container ID field. Under Settings, paste your container ID into Container ID. You can also paste the whole install snippet Tag Manager shows. The field finds the ID in it and shows Found GTM-… under it.
Select Save.
If the app is off, select Turn on. See App Store.
Open your storefront and start preview mode in Tag Manager. The container connects and you see the shop's events arrive, on checkout too.
The Setup guide section on the app page lists the same steps with a link to Tag Manager.
Settings
- Container ID: the ID of the container to load, in the form
GTM-followed by letters and digits, or the install snippet that holds it. Only the ID is saved. Tracking stays off until it is set, and a paste without a container ID is refused.
Consent
The container loads only after the shopper accepts analytics cookies. Until then nothing from Tag Manager runs, and events of the page wait: once the shopper accepts, the container loads and receives them in order.
Before the container loads, the storefront sets Google's Consent Mode v2 defaults, all denied, and then the shopper's choice:
- analytics cookies grant
analytics_storage; - marketing cookies grant
ad_storage,ad_user_dataandad_personalization; - preference cookies grant
functionality_storageandpersonalization_storage.
When the shopper changes their choice, the storefront updates the signals and pushes a consent_update event, so a tag that waits for marketing consent can fire on it. Every event also carries a consent object with analytics, marketing and preferences set to true or false. See Cookie consent.
Events in the data layer
page_viewon every page, withpage_location,page_title,page_referrerandpage_type.- The GA4 ecommerce events with an
ecommerceobject:view_item_list,select_item,view_item,add_to_cart,remove_from_cart,view_cart,begin_checkout,add_shipping_info,add_payment_infoandpurchase. searchwithsearch_term,sign_upandloginwithmethod, andgenerate_leadwithcontact_methodwhen a shopper sends a contact form or subscribes to the newsletter.
Every event has an event_id. The same purchase always has the same event_id, also when the order page is reloaded, so use it as the event ID of your Meta and TikTok tags to count each sale once. Before each ecommerce event the app pushes { ecommerce: null }, as Google recommends, so items never carry over from one event to the next.
The ecommerce object holds currency, value, transaction_id, tax, shipping, coupon, shipping_tier and payment_type where they apply, and the items. On cart, checkout and purchase events value is what the shopper pays, shipping and tax included; on product and list events it is the price of the items. Amounts are always in the cart's or order's own currency. A purchase also carries the order number as order_number.
Each item has item_id (the product), item_variant_id (the chosen variant, the ID in your product feeds), item_name, item_variant, item_brand, item_category, sku, price and quantity. The app never puts the customer's email address, phone number or address into the data layer.
Checkout and the order pages
Your container runs on every page, the checkout steps and the order pages included, on your own storefront address, so preview, sessions and ad clicks work as everywhere else. The checkout steps send begin_checkout, add_shipping_info and add_payment_info, and the thank-you page sends purchase.
On checkout and the order pages, where shoppers pay and see their order, Tag Manager runs under its own restriction:
- Google's tags (Google Analytics, Google Ads, Floodlight) and tags made from community templates run as usual.
- Custom HTML tags and custom JavaScript variables do not run. This keeps code that could read what a shopper types or their order details off these pages.
- Tags load only from the services Poltura allows there: Google, Meta, TikTok, Pinterest, Microsoft and Klaviyo.
If your Meta or TikTok pixel is a Custom HTML tag, it misses checkout and the purchase. Turn on the Facebook & Instagram or the TikTok app for them instead: they run on every step and also send the steps and the purchase from the server, with the same event ID, so nothing is counted twice. Settings → Tracking shows the tags it found in your published container, offers to move them into these apps with one click, and lists the Custom HTML tags that do not run there. See Tracking.
What shoppers see on your storefront
Nothing changes on the page. Shoppers only see the cookie bar that the storefront shows anyway, and what your own tags add.
If something goes wrong
- The container does not load. Check that the app is on and that Container ID has the
GTM-form with no spaces around it. Save the settings again and reload the storefront. - Tag Manager preview does not connect. The container loads only after analytics cookies are accepted. Accept them in the cookie bar of your test window.
- A Custom HTML tag does not fire on checkout. That is the checkout restriction. Use a template tag or the matching Poltura app. See Checkout and the order pages.
- A marketing tag fires before the shopper accepts marketing cookies. The tag has no consent requirement. Add one in the tag's consent settings in Tag Manager, or fire it on the
consent_updateevent whenconsent.marketingistrue. - A change in Tag Manager does not show on the storefront. Publish the container in Tag Manager. Preview mode shows unpublished changes only to you.
- Meta counts purchases twice. A Meta pixel runs both from your container and from the Facebook & Instagram app. Settings → Tracking warns about it. Remove the pixel from your container, or send the data layer's
event_idas its event ID.