Store settings is a section of the Settings sidebar, right below General. It gathers the settings that shape how your store sells and runs day to day. Its most important page is Selling setup. It tells you whether your store can take orders, and it sets the defaults every new product inherits.
What the section contains
Each page of the section is listed in the Settings sidebar, in this order.
| Page | What it is for | Guide |
|---|---|---|
| Brand | Your logo, icon, colors, slogan and social links, used everywhere your store shows. | Brand |
| Selling setup | Whether the store can sell, and the defaults new products inherit. | This page |
| Customer accounts | Who sees prices, whether only signed-in customers can enter, and business sign-up. | Customer accounts and sign-in |
| Abandoned Cart | Reminder emails for customers who leave items in their cart. | Abandoned cart reminders |
| Order numbers | The pattern and sequence of your order numbers. | Order numbers |
| Returns | How customers send things back, and the statutory withdrawal function. | Return settings |
| Return numbers | The pattern and sequence of your return numbers. | Return numbers |
| Pre-orders | Checkout, payment and queue rules for every pre-order. | Pre-orders |
| Notify me | Double opt-in, how long requests are kept and how the "available" emails are batched. | Notify me |
Pre-orders and Notify me come with some plans only. When your plan lacks them, their rows in the sidebar show a lock.
Two related settings live elsewhere in Settings. The business name and postal address your marketing emails are sent under are on Store details. The automatic delivery of digital products is under Delivery.
Before you start
- You need a role that can change store settings: Owner, Administrator or Store manager.
- The Returns and Return numbers pages need access to orders.
Check whether your store can take orders
Open Settings and choose Selling setup under Store settings.
Read the tag beside the title: Sellable, Needs attention, Not sellable, Not live or Couldn't check.
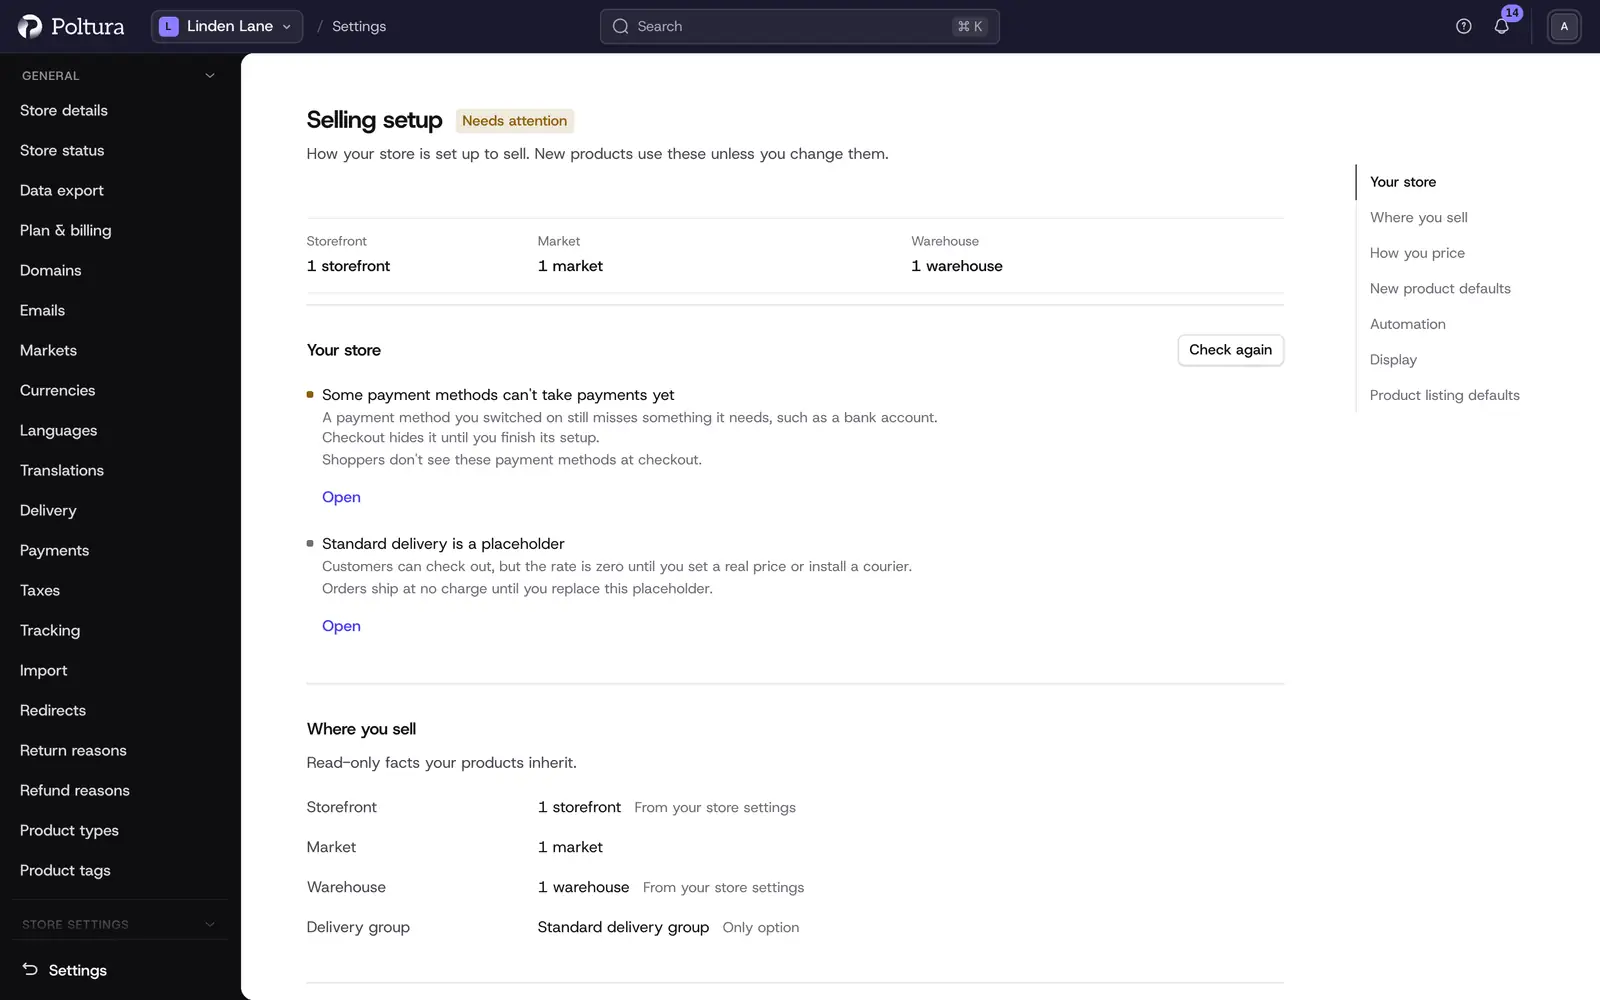
Each issue under Your store has a link that opens the page where you fix it. The band under the title counts your storefronts, markets and warehouses.
The Your store section lists what stands in the way, the most serious first. When nothing does, it reads "Your store can take orders."
On a finding click Fix this when the store can repair it for you, or Open to go to the page where you fix it yourself.
Click Check again after you changed something.
A fix that creates missing setup asks first: "This will create missing store setup. Nothing existing is changed." Confirm with Create.
The Where you sell panel shows facts your products inherit and that you change elsewhere: the storefront, the countries you sell to, the warehouse and the delivery group.
Set the defaults for new products
On Selling setup, go to How you price. Require a price in decides when a product counts as priced: Your shop currency, Every currency you sell in or Any one currency.
Under New product defaults choose what a new product starts with:
- Track stock: whether stock is counted.
- Sell when out of stock: whether customers can still order at zero stock.
- Add a stock row on creation: creates a zero-quantity row at your warehouse so stock can be counted.
- Created as: Draft or Live.
- Visibility: Public or Direct link only.
Under Automation tick what you want:
- Apply these defaults to products created outside this screen covers imports and products created on a new product page.
- Ask me to confirm before publishing something that cannot be bought. Publishing is never blocked. You are only asked to confirm.
Under Display choose whether the Readiness card on the product page appears.
Click Save. A message confirms "Selling defaults saved."
These are starting values. You can change every one of them on a single product afterwards.
Set product listing defaults
Product listing defaults is a second form further down the page. It holds what every product says about its condition, dispatch time and maker unless the product itself says otherwise. Sales channels such as feeds read these values too.
Choose the Condition: New, Refurbished or Used.
Enter the Dispatch time in working days: how long you usually need to hand an order to the carrier. Use a whole number up to 60.
Fill in Manufacturer if you make most of your products yourself: name, postal address and email address.
Fill in Responsible person in the EU if your products are made outside the EU. This is often your own business.
Click Save listing defaults.
Good to know
- Tax display on this page is read from the store's price settings and cannot be changed here. See Currencies.
- The readiness card is described under Product readiness checks.
- The Store settings entry of the user menu at the top opens Store details, not this section.
If something goes wrong
- The tag reads "Couldn't check". The store did not answer the checks. Click Check again in a moment.
- The Warehouse row says there is no warehouse yet. Products with tracked stock cannot be bought, because the store has no stock location. Add one. See Stock per location.
- "The store refused those values, so nothing was changed." Check the fields and save again.
- "Use 60 days or fewer." or "Use a whole number of days." Correct the dispatch time.
- "Add the name too." A manufacturer or responsible person needs a name when its address or email is filled in.