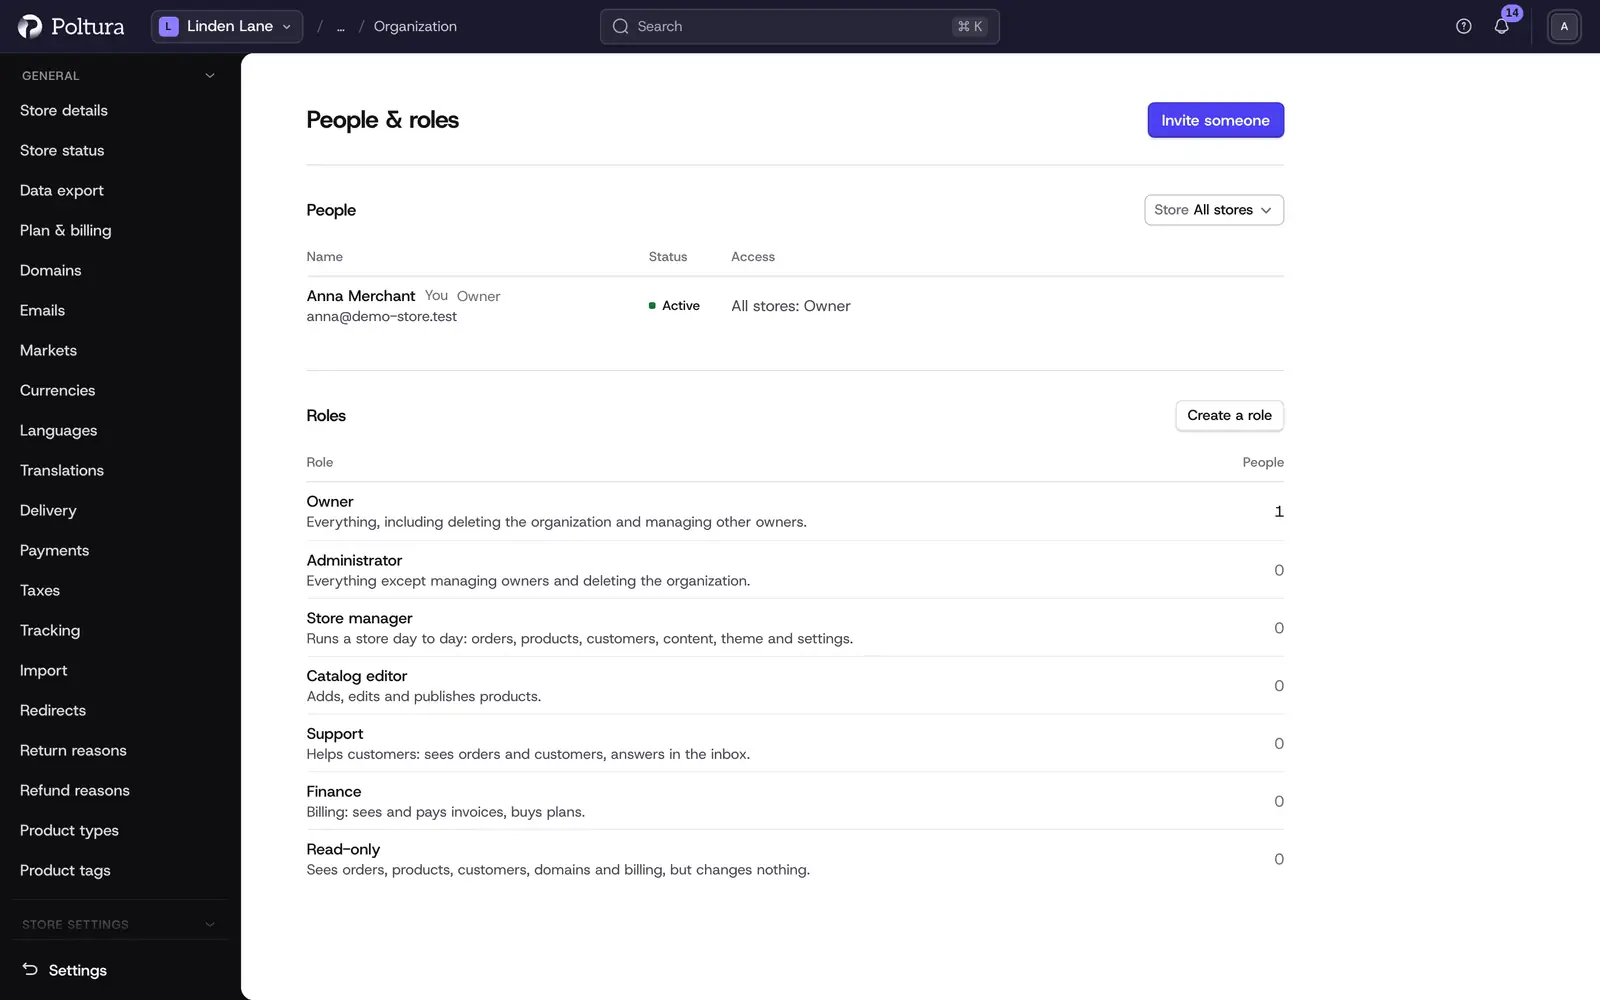
People & roles is where you run your team: who can work in your shops, in which ones, and what each person may do there. The page has two sections. People lists everyone with their email, status and access. Roles lists the ready-made roles and the roles you created yourself.
Before you start
- Owners and Administrators can invite people, change access, remove people and manage roles.
- Only an Owner can make someone an Owner or change an Owner's role, and only after signing in with a passkey or an authenticator app.
- Nobody can give more access than they hold themselves.
- Your plan sets how many people can work in a shop (team seats). See Plan and billing.
Invite someone
Open Settings and choose People & roles.
Click Invite someone.
Enter the person's Email. First and last name are optional.
Choose the Role. See the list of roles below.
Under Stores choose All stores (including stores you add later) or Only some stores, then tick the stores under Which stores.
Click Send invite. A notice confirms "We emailed an invite to" followed by the address, and the person appears in the list with the status Invited.
The person gets an email to set up their sign-in. The notice also shows a one-time sign-in link you can pass on yourself. It is not shown again. If the address already has a Poltura sign-in in your organization, no email is needed and the notice says the person is on the team now.
Change or remove a person
Click a person in the list to open their page.
Change what they can do
In the Access section choose Same role in every store or Different role per store.
Pick the role. Per store, you pick a role for each store or leave a store on No access.
A save bar shows the number of unsaved changes. Save. A message confirms "Team role updated".
The change takes effect for the person right away. They do not need to sign in again.
Block or unblock
In the Sign-in section, the Blocked switch stops a person from signing in to any store while they keep their roles. Switch it off to let them back in. The switch applies immediately, and you need to be signed in with a passkey or an authenticator app to use it.
Remove from the team
In the Danger zone section click Remove from team.
Confirm with Remove from team. You return to the list and the person is gone.
The organization always needs at least one Owner: the last Owner cannot be removed or given another role.
Roles
Ready-made roles
| Role | What it is for |
|---|---|
| Owner | Everything, including deleting the organization and managing other owners. Always covers all stores. |
| Administrator | Everything except managing owners and deleting the organization. |
| Store manager | Runs a store day to day: orders, products, customers, content, theme and settings. |
| Catalog editor | Adds, edits and publishes products. |
| Support | Helps customers: sees orders and customers, answers in the inbox. |
| Finance | Billing: sees and pays invoices, buys plans. |
| Read-only | Sees orders, products, customers, domains and billing, but changes nothing. |
The exact permissions of a role are shown when you open it. Ready-made roles cannot be changed.
Create your own role
In the Roles section click Create a role, or Duplicate on a ready-made role to start from its permissions.
Type the role's name.
Go through the areas under Store and Organization (Orders, Products, Customers, Discounts, Billing, Domains and so on) and choose a level for each: No access, View, Edit or Full. A higher level includes the lower ones. Details shows the single permissions of an area.
Click Create role. The role is listed and can be chosen when you invite or edit a person.
- To change a role, open it, edit it and click Save role. The change applies right away to everyone who has the role.
- To delete a role you created, open it and choose Delete role. People who still have the role must be given another one first. Deleting cannot be undone.
Your own roles are in Beta and may not be switched on for your organization. The page then says "Your own roles aren’t available for this organization yet. The ready-made roles below work as they are."
Good to know
- Statuses in the list: Active, Invited, Blocked and Disabled. Owners are marked Owner and listed first. Your own row is marked You.
- With two or more stores, the Store filter shows who can work in one store.
- Owners and people with a role in every store take a seat in each store. Pending invites and blocked people keep their seat.
- A person's role decides which Settings pages they see. A Support member, for example, does not see Plan & billing.
- Every invite, change, block and removal is recorded with who did it.
If something goes wrong
- "No free team seats left". The store's plan has no room for another person. Remove someone, buy a team member add-on or upgrade under Plan and billing.
- "This person is already on the team." Open them in the list and change their access there.
- "This email belongs to someone in another organization." That address cannot be invited. Ask the person for another address.
- "You can’t give more access than you have yourself." Choose a role within your own access, or ask an Owner.
- "The organization needs at least one owner. Make someone else an owner first." Give another person the Owner role before you change or remove the last one.
- "Someone else changed the team, so we reloaded it." Check the page and make your change again.