The setup guide is a checklist of what a store needs before it can take an order. Poltura checks each step against your real store, so a step is ticked only when the work is done. Nothing is ticked by hand.
Open the setup guide
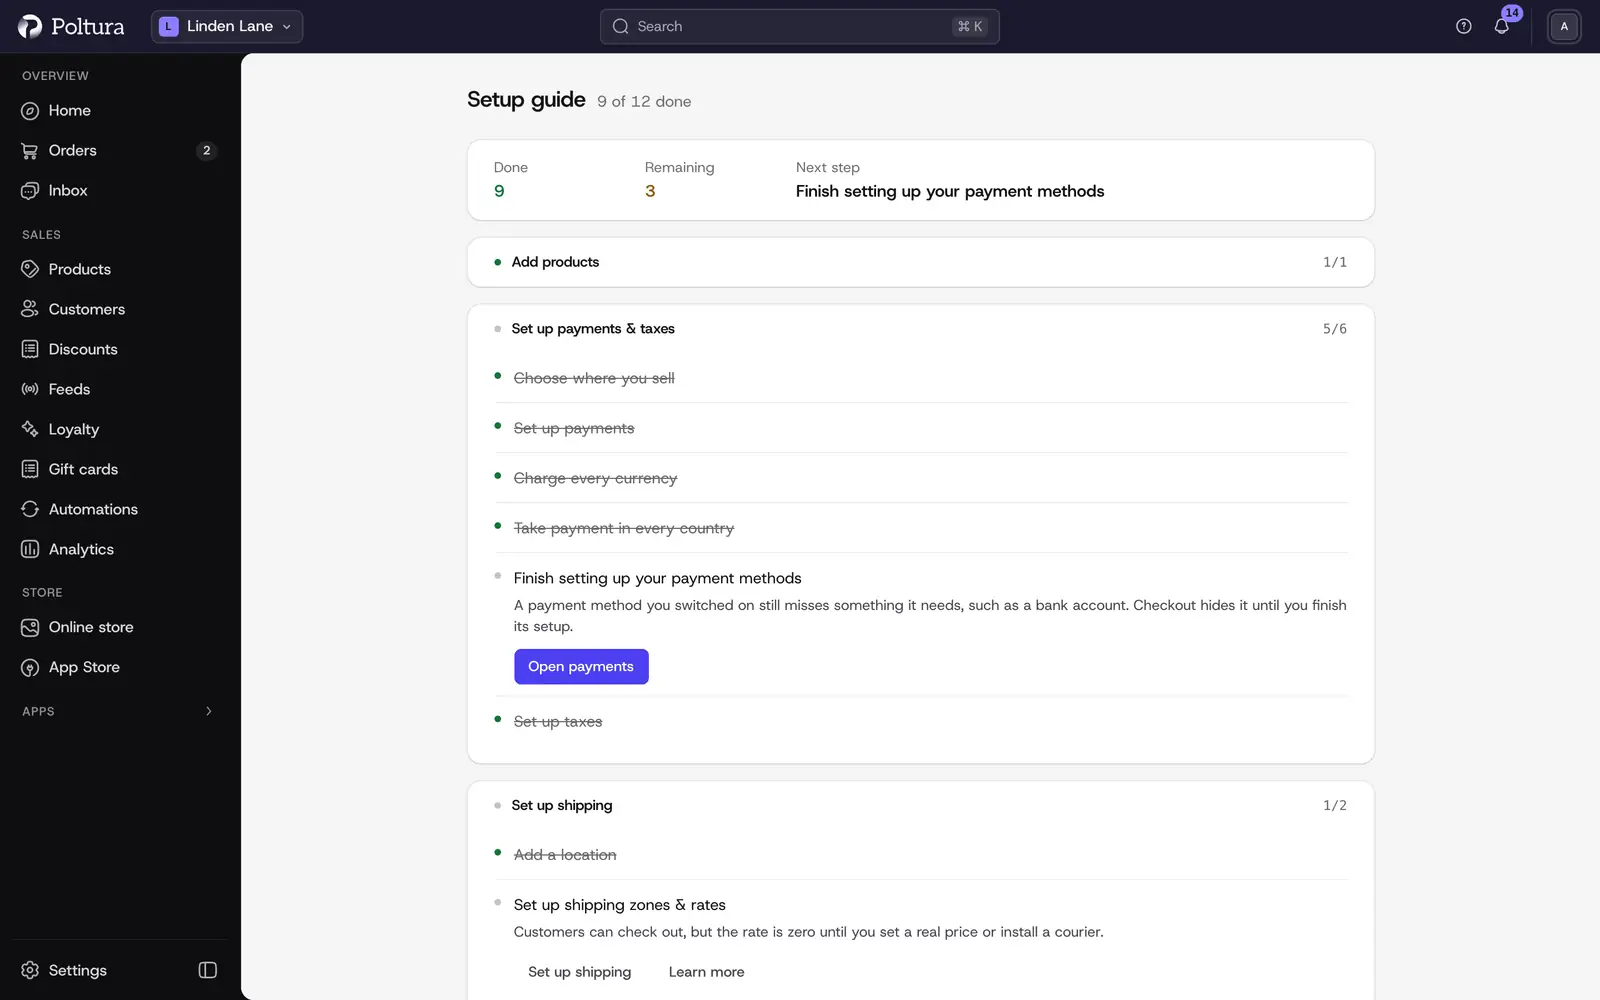
Open Home. While the store is not ready, the page greets you with Get ready to sell and shows a Setup guide chip with your progress.
Select Continue on the chip, in the Needs attention block, or in the bar at the top of any page.
Read the summary at the top: Done, Remaining and Next step.
Open a group and select the button on the highlighted step. It takes you to the page where you finish it.
When you come back, the step is ticked and the next one is highlighted. Finished groups fold away.
Add products
Add a product
Publish at least one product. Customers do not see drafts. Select Add product to create one, or Import products to bring a catalog from another platform. See Create a product and Import.
Set up payments & taxes
Choose where you sell
This step sets where you sell: the countries you ship to, with your store currency and their tax. The wizard normally sets it up from the countries you picked. If this step is open, follow it to Markets and add a market for your countries. You manage countries, currencies, languages and domains under Markets.
Set up payments
Each currency you sell in needs at least one way to pay before an order can be placed in it. Payment providers come as apps: install one and connect your account. It is offered in every currency it can charge. See Payments and, for example, Stripe, Barion or Bank transfer.
Set up taxes
Every country you sell to needs a tax rate so that totals and invoices come out right. Check the rates even when the defaults look right. See Taxes.
Set up shipping
Add a location
Stock is kept at a location, such as your warehouse or shop. The location has to be connected to your online store, otherwise checkout cannot promise what you have. See Stock per location and Locations and shipping.
Set up shipping zones & rates
Tell checkout where you deliver and what it costs. If no rate covers a country, customers there cannot complete an order. See Delivery. Courier apps such as GLS, Foxpost and MPL add their own delivery options.
Customize your online store
Connect your online store
This step checks that your storefront is connected to the store: it needs a sales channel and an access key before products can appear. If the step is open, select Connect store. The pages behind it are part of developer mode. See Sales channels and API keys.
Launch
Place a test order
Walk through checkout yourself so you know the path a customer takes. Select View orders on the step: it opens your storefront when the store has one. The step is ticked as soon as the store has its first order.
Good to know
- The guide shows Checking your store… for a moment while the checks run.
- Two extra steps can appear. Finish setting up where you sell shows when the countries you sell to, taxes and standard delivery could not be set up automatically. Set your shipping price shows while the Standard delivery option is still free: set a price, or select Keep it free to remove the step.
- The bar at the top of the page can be closed with the X. The guide itself stays available from Home.
- When every step is done, a Dismiss button appears on the guide. Use it to put the guide away for good.
- The guide tells you whether the store can sell. It does not open the store. To do that, see Go live.
If something goes wrong
- A step stays open after you finished it. Go back to the guide so the checks run again. Read the text on the step: when a check fails, it says what is still missing.
- The guide keeps showing "Checking your store…". The store could not be reached. Reload the page in a moment.
- A button opens a page you do not recognize. Some steps open pages that normally show only in developer mode. You can do the same work from the Settings pages linked above.