Menus are the links in your store's header and footer. Each theme has three: Primary navigation in the header, and Footer quick links and Footer legal links in the footer. You decide what is in them, in what order and what each item is called in each language.
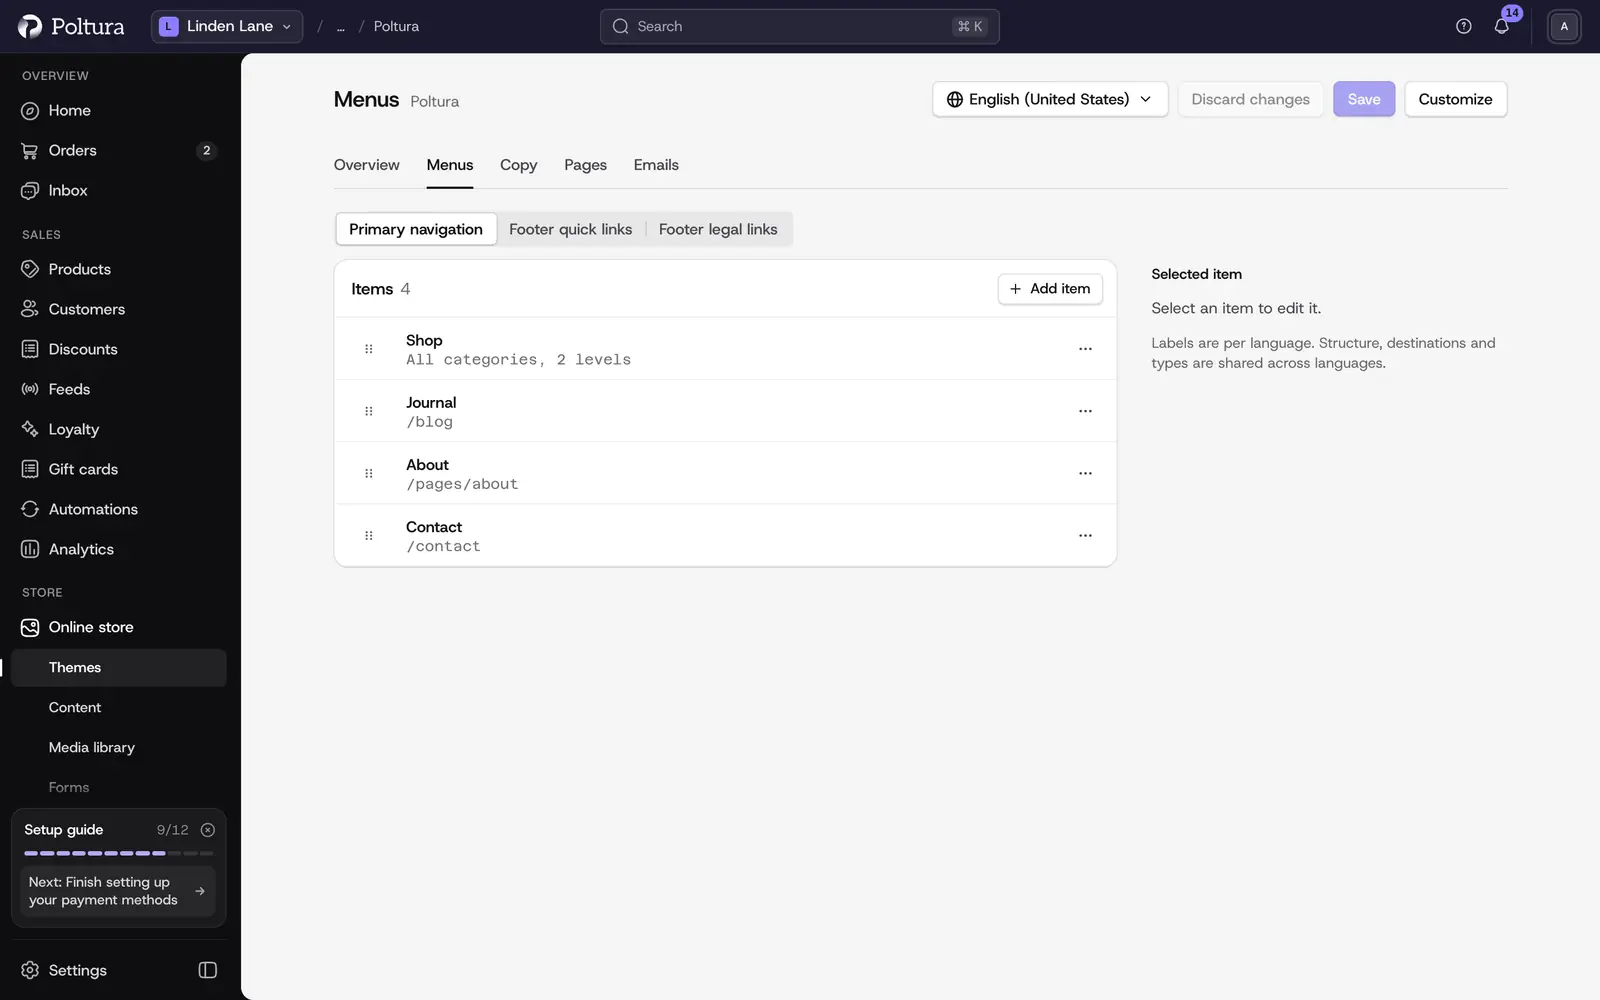
Open the menu editor
Open Online store and choose Themes.
Click the theme's name, then open the Menus tab.
Pick the menu you want to edit with the menu switcher at the top.
The Items list on the left shows the menu. Click an item to edit it under Selected item on the right.
The same menus can be edited in the customizer, under Theme settings → Menus, where you see the result on the preview.
Add an item
Choose Add item.
Type the Label shoppers will see.
Choose the Type: Link, Category menu, Pages menu or Mega-menu.
For a link, pick the Destination: a page of your store, or Custom link to type a path or a web address.
Choose Save. The header shows Unsaved changes until you do.
Saving writes the menus into the theme's draft. Publish the theme to show them to customers.
Choose the right type
- Link goes to one place: a store page or any address you type.
- Category menu fills itself from your category tree. It stays up to date as your catalog changes. Pick one Category or All categories, set the Depth (1 level or 2 levels), and decide whether to show a "View all" link. Show items directly in the bar puts the subcategories straight into the header instead of under one item.
- Pages menu fills itself from the pages you wrote under Content.
- Mega-menu opens a wide panel with links, images and products under the header item. See below.
Automatic types fill their own sub-items, so you cannot add sub-items to them by hand.
Reorder and nest items
- Drag an item by its handle to move it, or use Move up and Move down.
- Make a sub-item nests an item under the one above it. Move out of the parent brings it back to the top level.
- Remove item deletes it. If it has sub-items, they are removed with it.
Menus go one level deep: an item with sub-items cannot itself become a sub-item.
Translate the labels
Structure, destinations and types are shared by every language. Only the labels are per language.
Choose the language at the top of the menu editor.
Click an item and type its label in that language.
Leave the field empty to use the base label.
Choose Save.
Build a mega-menu
A mega-menu is designed in the customizer, because it is built from sections like a page.
Open the theme in the customizer and select Header in the sidebar.
Select a menu item of the header and set its Type to Mega-menu.
Choose Create mega-menu and give it a name.
Pick a Starting layout: Link columns, Links + promotional card, Links + products or Start blank.
Add or change its sections: Link list, Products, Image card, Featured product and Divider.
Set the Alignment (Left, Centered or Spread out) and the Size (Compact, Comfortable or Spacious).
Choose Back to menu when you are done, then publish.
One mega-menu can be reused under several items with Use an existing mega-menu.
Good to know
- A menu can hold up to 50 items, and one item up to 12 sub-links.
- Footer menus show one flat list of links. The store ignores category, pages and mega-menu types in a footer menu. Use Turn into a plain link on such an item.
- A mega-menu can have up to 6 sections.
- Each item can open on hover or on click on desktop, with Open on desktop. On mobile, menus always open with a tap.
- The Launch theme always opens the main menu from one MENU button.
If something goes wrong
- "Could not save the menus". Choose Save again.
- "This dropdown no longer exists." The mega-menu the item pointed at was deleted. Choose another one or create a new one in the customizer.
- A category is missing from a category menu. The menu follows your category tree. Check that the category is set up under Categories.
- The new menu is not on the store. Menus are saved to the draft. Publish the theme.